A new heat pad comes with a leaflet about voltage and a warning not to swallow it. What it doesn’t tell you is how to work out your own settings, where to keep it, and what normal looks like on your skin.
Spend a week getting this right and the pad does its job for years.
Before you plug it in
- Check you should be using one at all. Two minutes on who should not use a heating pad, particularly if you have diabetes, numbness anywhere, or you’re pregnant.
- Check the plug. If it has two round pins, you need a proper fused adapter, not a shutter opener and not a pen. See using a 2-pin plug heat pad safely in Singapore and what the Safety Mark means.
- Read the manual for two things only: whether it has an auto shut-off timer, and whether the cover is machine washable.
- Pick your spot. A socket near where you actually sit, with the cord out of walkways.
Day 1: find your setting
Cover on. Lowest setting. Sit or lie with the pad resting on you, not underneath you. Ten minutes only, the first time.
Then look at your skin. Even light pink that fades within an hour is what you want. Blotchy red, or white patches, means too hot even on low, and you should add a layer of clothing under the cover. The mottled pattern to watch for is toasted skin syndrome.
Most people never need to go past the lowest setting. If you can barely feel it after five minutes, give it another five before turning it up: pads take time to reach temperature.
Days 2–3: build to a full session
Fifteen to twenty minutes, with a timer. Check the skin each time.
Set a phone timer rather than relying on a TV programme ending. If the pad has no auto shut-off, a plug-in timer switch from any hardware shop costs a few dollars and removes the problem permanently.
Days 4–7: attach it to something
This is where a heat pad either becomes part of your routine or ends up in a drawer.
Pick a moment: first thing in the morning if you wake stiff, or before your exercises, or when you get in from work. The key is that movement follows the heat. Heat then sitting down achieves very little. See “my physio said use heat” — but how, exactly?
Two or three sessions a day is plenty, with at least an hour between. At that rate the running cost is small: what a heat pad costs to run.
The four rules that matter
- Cover on, always. Never bare pad on skin.
- Pad on top of you, never lying on it. Pressure plus heat is how burns happen.
- Never fall asleep with it on. See is it safe to sleep with a heating pad on?
- Never over a heat rub or medicated patch. See deep heat rubs and heating pads.
Looking after it
Roll it rather than folding it, unplug at the wall when you finish, and wash the cover about once a month. Never put the heating insert in water. Full detail: how to wash and care for your heating pad. Treated that way, a pad lasts years, and it travels if you fold it into a case rather than creasing the wires.
After a week, ask yourself
- Is it helping? You’re looking for easier movement afterwards, not just pleasant warmth during.
- Am I using it instead of moving? If so, that’s the thing to change.
- Is my skin fine every time? If not, lower the setting or shorten the session.
- Has anything changed at all? If a week of proper use has done nothing, the problem probably needs looking at rather than more heat.
Still unsure whether heat is even right for your problem?
Start at heat or ice: a physio’s decision guide.
Buying a second pad, for the office or for a parent? The size guide and where to buy a heat pad in Singapore cover it.
The heat pad we use
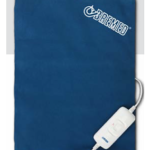
We’ve supplied the Bremed BD7800 since 2010. It holds a steady temperature, covers a whole lower back and has a machine-washable cotton cover. Physiotherapy clinics in Singapore use it with their patients.
Clinically reviewed by: Nigel Chua (Hand Occupational Therapist) & Louise Yow (Physiotherapist). This article is general information, not a diagnosis. electricheatpad.com sells electric heat pads.